by Andrea | Oct 31, 2016 | DIY, handmade, Sewing, tutorials, Uncategorized

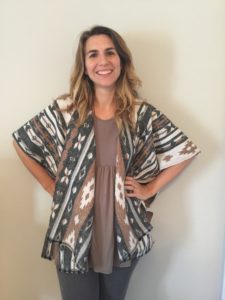
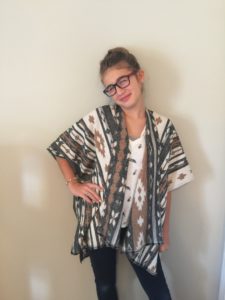
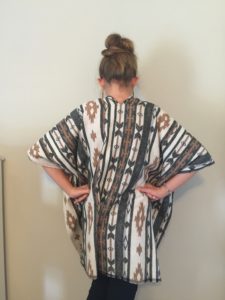
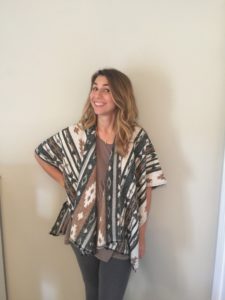
Welp, I have fallen onto the bandwagon of trendiness this fall. I really hated ponchos back in the 90’s but I like the new blanket style ones that are on the very front display at Target this year taunting me with their plaids and tribally goodness like sea sirens to a sailor. I was at Joanne’s this week a couple times for ONE THING. I kept walking past this woven tribal fabric and I couldn’t stand it. I brought it home and promptly turned it into a blanket poncho. Even my 12 year old likes it. That’s saying something. It was my reward for finishing the fancy fox quilt for my daughter that took like 1200 hours.
If you’d like to join in on the poncho trend, I’ve made up a quick and easy poncho tutorial for you to follow. It takes 1 yard of fabric and about 20 minutes tops!
Did I to mention it’s CHEAPER?! You could make 3-4 of these for the price of a Target or Gap one right now! Can we say CHRISTMAS GIFTS?!!! If you purchase 1 yard of 60″ wide woven fabric for 12.99 and they have most of it 40% off right now, then you use your 20% off total purchase coupon….. well, you have yourself an amazing poncho for only $6.30! So hurry and get started! Here is the nitty and the gritty in an easy to follow downloadable image! I’d love to see your ponchos! Tag em #aldeasyponcho

EASY BLANKET PONCHO TUTORIAL DOWNLOAD
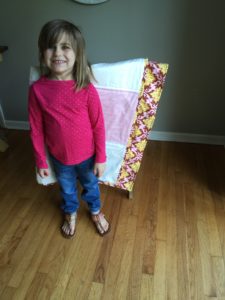
Here are some pictures of me and my 12 year old daughter trying it on….so it’s pretty versatile size wise but I have included instructions for a custom fit do you can make for ANY SIZE!!!! Happy Poncho-ing. Make all the ponchos!!!
-Andrea
Grace was my photographer and her Miranda impressions made it impossible for me to do anything but cheesy laughing faces. She’s pretty cute.



by Andrea | Oct 28, 2016 | DIY, Sewing, tutorials
 If your new to the blog, I am continuing my series on How To Magically Make More Time For Sewing…….you can read Part 1 HERE.
CLEANING
Let’s talk about cleaning. Many people wonder….Is my house a pig sty? Sometimes yes. It’s because I have 5 children who are well, children. They run around in the wonderment of carefree childhood and drop their drawers anywhere but in their dresser drawers. I really struggle with being patient and kind with my children in this area. If I had actual magical powers I would most often use them to clean my house. Yes, I am Monica from friends. What would be my spirit animal? Maybe that little parasite that cleans the side of fish tanks?
I have prepared some helpful how to infographic printables to help you and I teach our children how to do specific tasks like the laundry and dishes…..(note: I have updated the How To Dishes Chart with “Rinse Clean” after hand washing.)
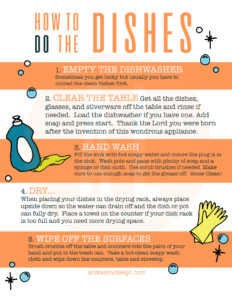
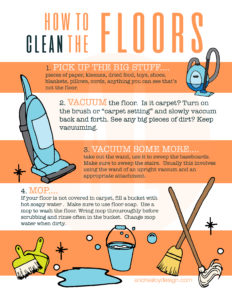
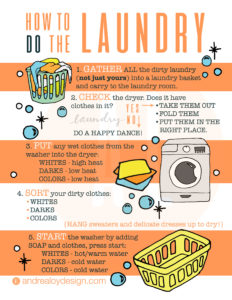
These are free for anyone who signs up for my email list. I am unashamedly building an email list and trying to figure out mail chimp. (The struggle is not as real as I thought it would be.) If you have an extreme aversion to being put on an email list of some sorts, you may purchase these in my Etsy shop, Handful Of Arrows at a discount for reading my blog. Here is the coupon code for 50% off: MAGIC16
Here are the key elements of cleaning magic you need this week to create more sewing time!
1.) Lower your standards – this is my hardest one. It’s not everyones biggest struggle, but it’s mine. Delegating the cleaning of the bathroom means streaks and drips and bleach marks and mostly whiny rebellion in the lower ranks of your household. But stand firm soldier. It’s worth it for all involved. Your children will thank you when they are 35. Trust me. (I used to hire someone to clean my floors and bathrooms on a weekly basis. However that is not in the medschool wife budget. I would recommend that if you can afford it! I have always had the kids help too. Now that I have a 13, 10, and 7 year old they are capable of helping a lot more.)
2.) Delegate – yes, really. Don’t go in there and redo it. Refer to key element number 1 and sing “Let It Go” and pray for Jesus to help your heart. I am being sarcastic but I am also being serious. Your 12- yr old can do the dishes once a day. She can do a few loads of laundry a day. She may act like she doesn’t know that you are supposed to add soap everytime to the washer or wipe off the counters but just push on and work towards solidarity. Just think of all the life skills you are imparting to your precious ones. I have a bellyacher, a super eager helpful(somewhat self righteous) soldier, a my way or the highway type and a passive aggressive hide and do nothing type. All of these little girls will be fine. Someday. Just be nice and leave the emotions at the door. This will be very hard but you can totally do it. {Phil. 4:13}
3.) Expect failure and reteaching – this is the stuff of motherhood. I know there is no need to explain. Let’s not pretend. If you don’t have little ones at home, you probably don’t need this magical blog post in your life right now because you are experiencing the magic of empty nesting….
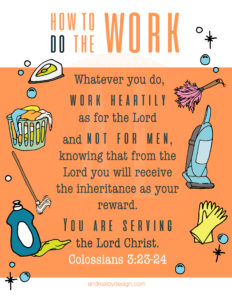
If you have young children, you will create more time for sewing (or whatever your happy place) by teaching and delegating household chores to them. It will only help them in the long run to be productive members of society who know what it takes to run a household, serve others, put family first, and value a good work ethic. While I can’t change their hearts, I do try to give them a bible verse with their training and pray it will take root. God’s Word will truly cause heart change with the grace and power that only come from Him. Here is a printable for that…
 Now sit down, relax, eat some bon bons and SEW until someone fills the dishwasher with regular soap and overflows the kitchen with bubbles or spills your coffee on the new rug. #thestruggleisreal#sewingismyhappyplace
If you are subscribed to my email list, these pretty and practical infographics will be delivered to your inbox for free. The sign up is on my home page. Thanks for reading! -Andrea
by Andrea | Sep 26, 2016 | DIY, Sewing, tutorials
The question I get most often is, “How do you find the time to sew and do your design work?” The obvious unspoken questions are: Do your children eat? Is your house a pig sty? Are you really homeschooling? Do your kids just watch TV all day or what? Are you on speed? Are you superwoman?
I have a few answers for you, my friends. No my children do not starve. Which brings me to part one of How To Magically Make More Time…..
FREEZER MEALS
I have found that most freezer meals on pinterest or in books range from slightly to grossly disappointing. Usually freezer meals are reserved for desperate measures. They involve cream of yuck soups and are high in carbs and low in nutrition. We usually don’t care because those meals are given in love and are truly a blessing. When making freezer meals to eat often, I don’t want to sacrifice our health or the importance of having meal time together as a family. I also don’t want to sacrifice good taste. Most importantly, I WANT TO SEW DURING NAPTIME instead of make dinner. Sound fun? It is. #worthit
THREE IMPORTANT RULES FOR FREEZER MEALS:
- Healthy – everyone has a different version of healthy. My version is meat, healthy fats, vegetables, whole grains. Our family is fortunate not to have many allergies or food intolerances, but you can definitely adapt most of my recipes to your needs.
- Easy – the finished meals cannot involve anything more than reheating. No multiple packets and steps. That is not a meal. That is food prep.
- Tasty – nobody really likes freezer meals that have no taste or are just full of chicken breasts with jam and cream of yuck. Let’s just make really great food and freeze it.
You don’t have to hold a big freezer meal making marathon. Especially if that makes freezer meals daunting for you. I usually buy enough ingredients to make four meals of one recipe. I make them all, we eat one for dinner that night and I freeze the other 3. However, it is super fun to have a girls night and make them together with friends or to host a freezer meal swap!
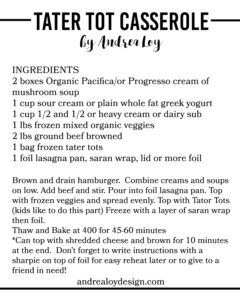
I’m sharing our family favorite, Tater Tot Casserole Recipe with you! If you’d like the rest of my recipes for free just sign up for my newsletter(at the bottom of my home page) and they will magically arrive in your inbox! FOR FREE. Delia helped me make these lovely TTC’s last week because I wanted to finish sewing a quilt this weekend. As Martha Stewart would say, “It’s a good thing.”
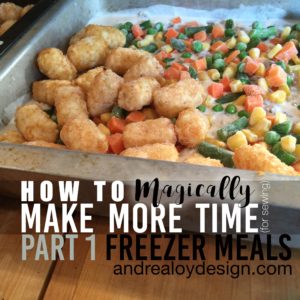
One more thing, I openly apologize to my mother (who faithfully reads all my blog posts) for complaining about tater tot casserole when she used to make it while I was growing up. To be fair, hers had mushy zucchini in it. Love you though. #bestmomever 🙂
Stay tuned for two more editions of How To Magically Make Extra Time (for sewing) (or whatever your happy place is).
-Andrea
by Andrea | Sep 2, 2016 | DIY, handmade, Sewing, tutorials
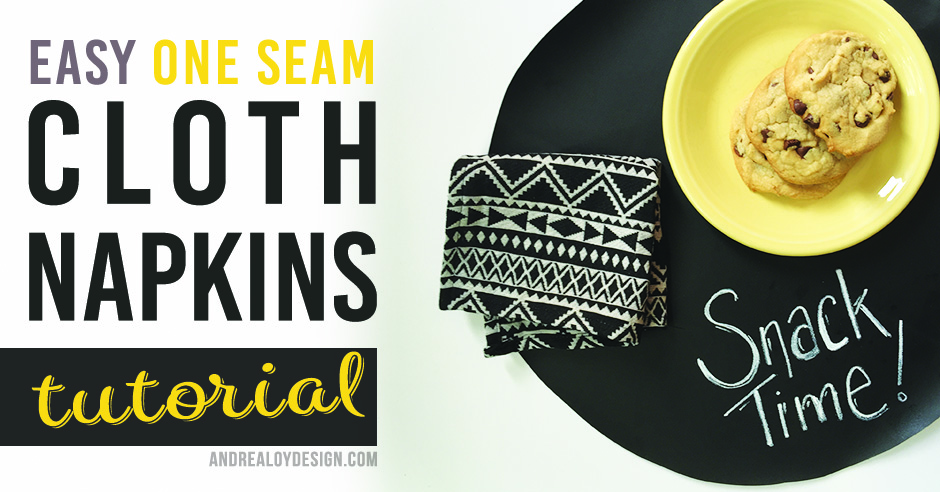
I really love cloth napkins. If you are thinking, “Who uses cloth napkins anymore?” Then you need to give them an everyday chance. I am here to show you how easy it is to make cloth napkins with ONLY ONE SEAM! All you need is a yard of fabric and some basic sewing supplies. You can do it! No advanced sewing skills needed. Think of all the cute dinner party themes! Think about how much money you’ll save not buying 1000 paper napkins every week. My children use like 50 napkins a day times 5 kids. I switched to cloth so everyone can keep the same napkin all day unless there is a major spill. Plus now my 12 year old helps with the laundry so basically I can just sit around and be lazy all day eating truffles and sewing more napkins.
FABRIC
Lets talk fabric. There are a variety of terms that no one on the inter-webs uses consistently. Basically you want a woven double cloth. This means a fabric with two right sides. I used some apparel cloth from Joann fabric stores. I can’t find a link to it online but here is some nice double cloth flannel they have… Anna Maria Horner has a beautiful collection called Loominous out that I have heart eyes over.
THE TUTORIAL
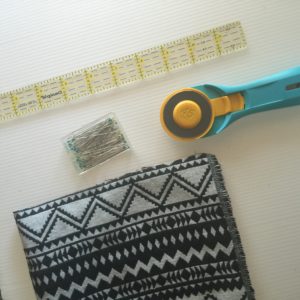
MATERIALS
- •1 yard double face woven fabric
- •pins
- •rotary cutter
- •cutting mat
- •clear cutting ruler
- •sewing machine
- •thread
- •optional: wonderclips
Cue the 90’s music “This Is How We Do It”
STEP 1.) Cut out 10″ squares of your fabric.
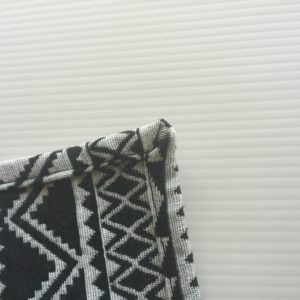
STEP 2.) Fold the fabric: turn corner down toward the center of your square 1/2″ then again 1/2″ and pin in place. Make your pin points to the exact middle of your square. Do this with all four corners of your square.

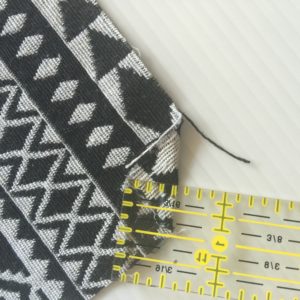
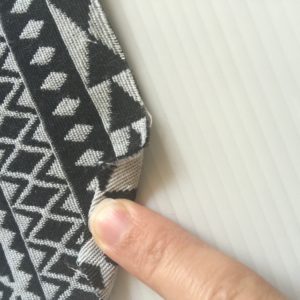
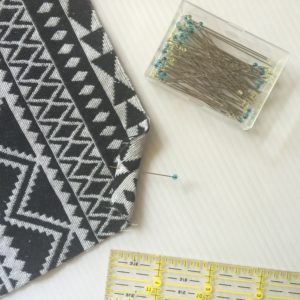
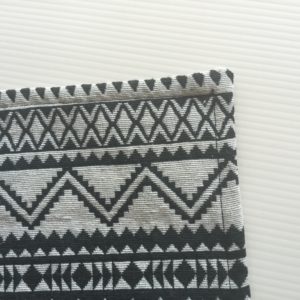
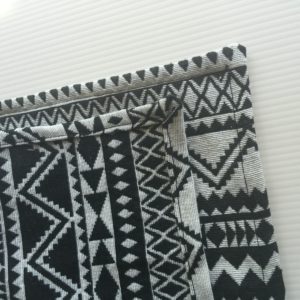
STEP 3.) Take one side of the square and fold it along the length as shown. Then again to conceal the raw edge. Be sure it makes a mitered edge to the corner. Use pins or wonder clips to hold in place. Repeat on all sides.
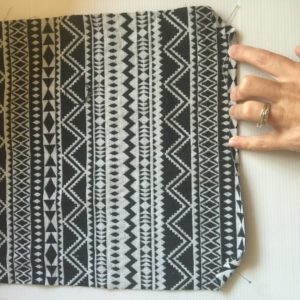
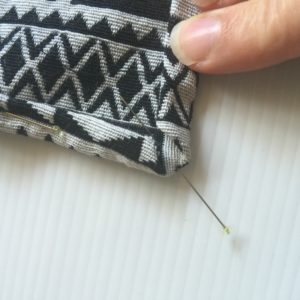
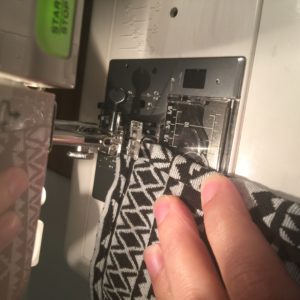
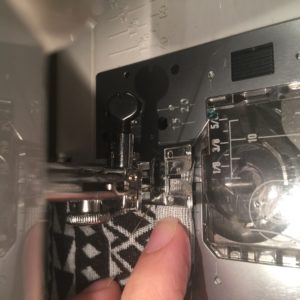
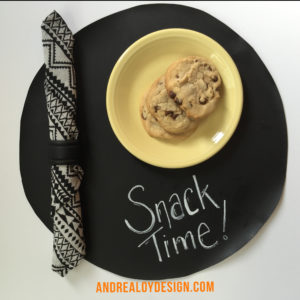
STEP 4.) IF you want to, at this point, you can iron your pinned napkin if you have glassed pins. Confession: I didn’t iron mine. I should have. You should too. Put a corner of your cloth napkin under your sewing machine and lower your needle to start/end in the downward position. When you get to the next corner leave the needle down, raise the presser foot and pivot. Keep sewing and pivoting until you get back to the first corner. Ta DA! You did it. Now have some cookies and wipe your milk mustache off with a cute napkin.
Thanks for joining me! Happy Sewing Friends! -Andrea
by Andrea | Aug 19, 2016 | DIY, handmade, quilting, Sewing, tutorials
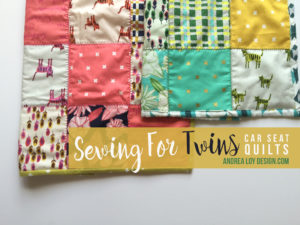
Sewing for twins is the best! We have some dear friends who my husband and I got the pleasure of doing marriage counseling with. Blake officiated the wedding ceremony. When they decided to have a baby, God gave them two! I remember sitting on the couch and holding my 1 week old Ruby when we got the news.
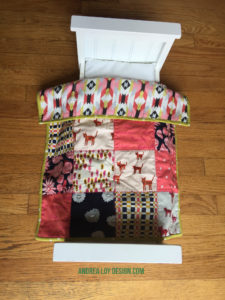
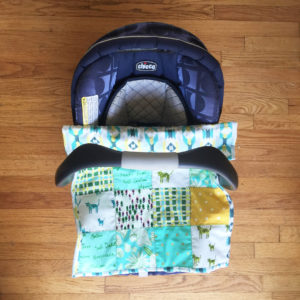
When we found out the twins would be a boy and a girl, I immediately knew what I wanted to make them. Carseat Quilts! Have you ever worried to death over your tiny infant in that huge carseat being suffocated by all the blankets? Well, I have. I’m a worrier….This time, with Ruby I used an American Girl Doll blanket when I tucked her into her carseat. It was perfect! It fit right around her and tucked in just enough. Babies grow so fast but it’s nice to have just what they need when they need it. When they grow out of the blanket it can be a wall hanging or a doll blanket or a lovie…
BUY A CHARM PACK
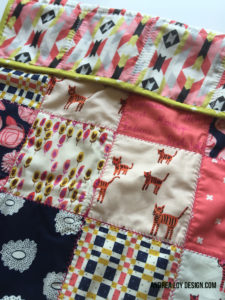
I bought a really cute stack of 5″ charm squares at Missouri Star Quilts by Alexia Abegg for Cotton + Steele Fabrics called “Hatbox.” It’s on sale right now for $6.95! That makes for a VERY inexpensive quilt, especially if you use what you already have in your stash for the rest. In case you don’t know, a Charm Pack is 42; 5″ x 5″ precut squares of quilting coordinates. It’s just so easy. I used to love buying 2 yards of my favorite fabric but now I like having them all cut up for me! Less is more…
DIVIDE AND SEW
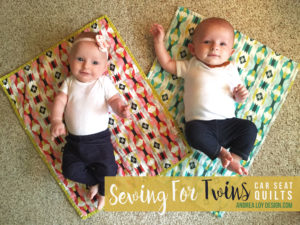
If you divide the charm stack you can make two carseat quilts. Hatbox came with two color ways…one with pinks and the other with greens, making it the perfect stack to use for the twins. The quilt measures approx 19″ x 24″ when your done. It’s nice to keep your quilts between 14″-19″ wide and 19″-24″ long for a carseat quilt.
Lay out your charms in 5 rows of 4…..Sew together, add very lightweight batting and backing or flannel and bind. I used Mountain Mist Cream Rose batting and Cloud 9 double gauze I had leftover from baby swaddles to finish these up. Both can be found at Joanne Stores.
QUILT & BIND
I chose to quilt in the ditch with decorative stitching. I thought the fabric had a vintage feel and that finishing it this way gave it an almost antique crazy quilt vibe.
If you need help with binding you can find all sorts of good tutorials out there in a google search. I have demonstrated using quilt backing to bind the quilt in both of my previous quilt tutorials here and here.
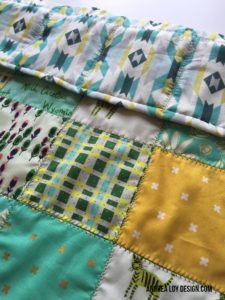
Here are some pictures…Bowen and Willow are ADORABLE and I’m thankful their parents were willing to share such sweet pictures!
Happy Sewing!
by Andrea | May 13, 2016 | handmade, quilting, Sewing, tutorials, Uncategorized
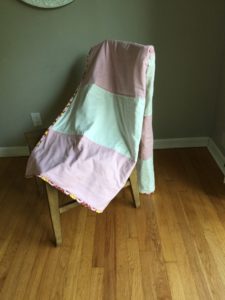
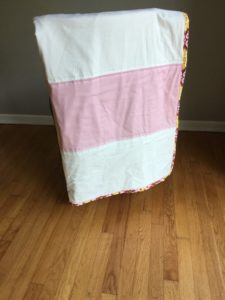
How to make a really great modern quilt in 4 hours using 5 yards of fabric:
BUT FIRST
Here’s how it happened. I’ve been brewing up a nice modern nautical stripe quilt in my head ever since my friend made some UH-MAZING ombre stripe toddler quilts for our Handmade Markets. I have this great piece of pink and marroon Amy Butler Fabric I’ve been hoarding for roughly 6 years now and I knew that it was the perfect quilt backing…plus the sister I had in mind for the quilt loves pink. Plus the sister was graduating and I wanted to make her a special gift. The equation worked out perfectly. I stopped for a lightning fast trip to Hobby Lobby to astound all the shoppers and fabric counter lady with my tribe of children. We had to answer ALL THE QUESTIONS, “Yes, their all mine. Yes, my hands are full – of good things. Yes – they are all girls.”
But I was not distracted. I saw the perfect shades of Kona Cotton to match the aforementioned hoarded fabric while chasing a child to stop her from running through the “maze.” I’m not really sure how we got from the opposite side of the store where we only needed one thing in the art supply section to the fabric maze. It’s like the Konas were calling my name.
When you know, you know. I saw those Kona Solids and knew I had finally found the perfect match for my Amy Fabric and my Stripe Quilt Idea. So here we are with grace from above and the stars aligned.
This quilt is perfect if you have a beautiful cotton print that you can’t bear to cut up.
WHAT YOU NEED:
TOP -2 yards complimentary cotton quilting fabric solids
BACK -3 yards patterned cotton quilting fabric
3 yards of batting -I LOVE really thin 100% cotton Mountain Mist Cream Rose Batting
WHAT TO DO:
1.) Cut your solids into 12″ pieces across the width of the fabric from selvage to selvage.
2.) You’ll end up with 6 pieces total, each measuring 12 x 44″
3.) Sew the stripes together alternating colors along the 44″ length side.
4.) Cut your backing fabric in half at the 1.5 yard line and sew together along the selvage to create the backing.
5.) Spread out your batting on a clean floor and smooth quilt top across. Trim batting to the same size. It should measure 44 x 70″
6.) Next carefully pick up your top and batting together and lay aside. Lay down your backing piece wrong side up. Place top/batting down on the middle of your backing piece and smooth from the center out with your hands. There should be about 2″ on either side of the length of the quilt sandwich and more at the top and bottom.
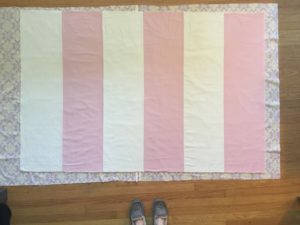
7.) Baste it. PIN THE HECK OUT OF IT WITH LARGE SAFETY PINS! Always smoothing, pin from center out. We don’t want our quilt sandwich bunching or shifting when we sew it together, do we now?
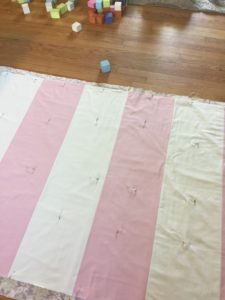
8.) Quilt it a 1/2″ on either side of the seams where your solids meet. Set your walking foot up if you want. Use a longer stitch length. Start in the middle of your quilt and sew out from centers of stripes.
QUILTING TIPS: If you try to start sewing at the ends all the way to the other end you will have bunching and unwanted pinching or pleating of fabric. Yuck. Don’t do it. I promise it doesn’t take much longer to keep starting from the middle of your quilt. Keep your quilt rolled up neatly under the arm of your machine so the bulk of the quilt will fit easier.
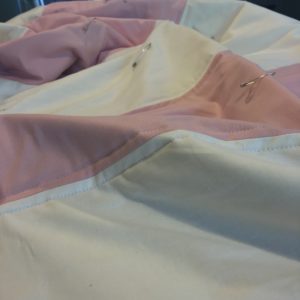
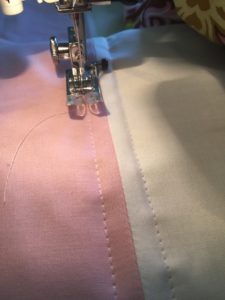
9.) Now trim thread tails and the backing of the quilt. Use a clear ruler and rotary cutter and leave exactly one inch of the backing fabric for your binding.
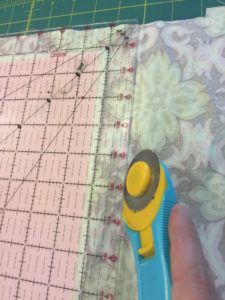
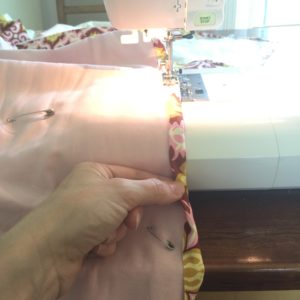
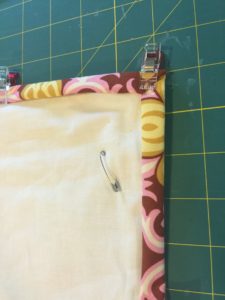
10.) Double fold the backing up onto the top of the quilt to create binding. I like to use wonder clips for holding the binding in place while I sew. Then you machine sew it along the edge. It’s so easy and fast. This binding technique saves so much time! Hence the ability to complete this quilt in just 4 hours!!!
Finished Quilt measures approximately 44″ x 70″ A great size for a twin bunk or napping couch throw!
DISCLAIMERS: No children were neglected or starved in the making of this quilt. I really did make it in 4 hours! I did not count the hour I stopped in the middle to feed/nurse children. I did count my time while helping children with school sitting next to me.
Show me your Modern Stripe Quilts! Tag ’em with #ALDstripequilts on your social media accounts!
HAPPY SEWING! You can do it!
